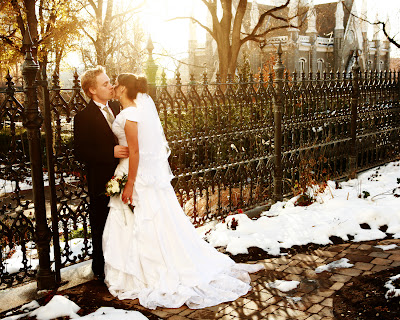
I don't usually shoot into the sun, but on this particular photo I didn't have much of a choice. It didn't matter where I stood the sun was directly in my lens. I went ahead and shot using the sun and sun spots and the result was fabulous. I have to give the credit to the sun and the couple. It was a bit chilly, but well worth it.
Oh, my favoirite part! This photo really allows for some fun filters to use. I love using some higher contrast when the photo allows for it. Here we go... Once your photo is up, create a new layer; then go over to the layers palette on the right side. Under the layers tab there is a "thing" (lost for words right at the moment...) that says "normal", click on the arrows and a new menu will appear. Scroll half way down and you will see "soft light". You will then need to flatten the layer if you like what you see. Once in a while the skin will go quite red, so I will use the "hue and saturation" on red and take some of that out. I also used an action called "Swift Skin". I don't necessarily use it for skin. I love what it does to the whites in a photo. It has a real soft "airy" feel. Anyway, I used the "low" action on this photo. As I look at the info on the disk, I can't see a web site specifically for the "swift skin". His site, Jim Chamberlain is www.chamberlainphoto.com and maybe he has something on the website. It was a good class, just like any other class, I always come away with something useful.


2 comments:
thanks for all the tips you leave. Now, have you created templates for all these fun collages? How do you make templates and what sizes do you do? Do they fit normal size frames? I do collages but I have to keep making them over and over cause I don't know how to make a template. Help!!!
You can create them any size, standard or not. I love squares, so most of mine are squares. To create a template that you can use over and over...
1. Tool Bar- "new". Type in the size making sure that it has 300 dpi. choosing transparant as the background option.Once that appears with the gray and white squares, you need to choose a color to create a background. I usually use white. Now you are ready to place your photos.
2.Bring up your photos that you will be using on the template.
3. Create guide lines so that all of your photos are straight and even. Mine are slightly above center to allow room for the name. You don't want it bottom heavy and it is visually better to have it higher than lower on the board.
4. pull the photos into the layout you created with the guide lines.
5. After they are all straight and "perfect". Save this layout.
6. To save this for another project- "Template"-
1. In you layers pallet make sure the background layer is highlighted for the next step.
2. Use the marquee tool on the square shape. Short cut- "M" key. Carefully outline one photo making sure you are not under or over the size of the photo because you want to make sure they will be all the same. Once the photo has the "marching ants" around it hit the delete key.
3. Look over in your layers palette and the background layer will have a small square cut out of it. Continue with each photo.
4. I even leave the name if I like the font and then just change it for the next child, illuminating time in trying to remember what font I used.
5. After all the photos have been done, now you can delete the layers with the photos. You now have a palette with open squares cut out, yea! Save this as a tiff!!! I have a template file with all the shapes that I can go to.
6. When you are ready to open it up for another project: bring the template and photos up, when placing the photo, it will appear on top of the template which should be layer two with layer one being the transparent background. Drag the photo layer below the template layer. The photo will now appear under the square openings. Hold the move key (V) and place the photo under the opening desired. If there is part of the photo showing in another opening- I use the marquee tool to trim the photo down.
7. Continue with the remaining photos. The photos do not need to be cropped to fit exactly in the opening, in fact that makes it harder, better a little bigger.
8. Save the project to another name. Your done.
Email me with any other questions.
thx
Post a Comment